Sometimes when you open AutoCAD, there will not be a viewcube. It is common. Don’t worry. Here are 3 Methods to bring back your missing AutoCAD viewcube. It can happens due to someone have changed the settings or may be some loading issue with AutoCAD. We can help you to fix these in simple steps. Follow the steps.
AutoCAD Viewcube Missing Problem
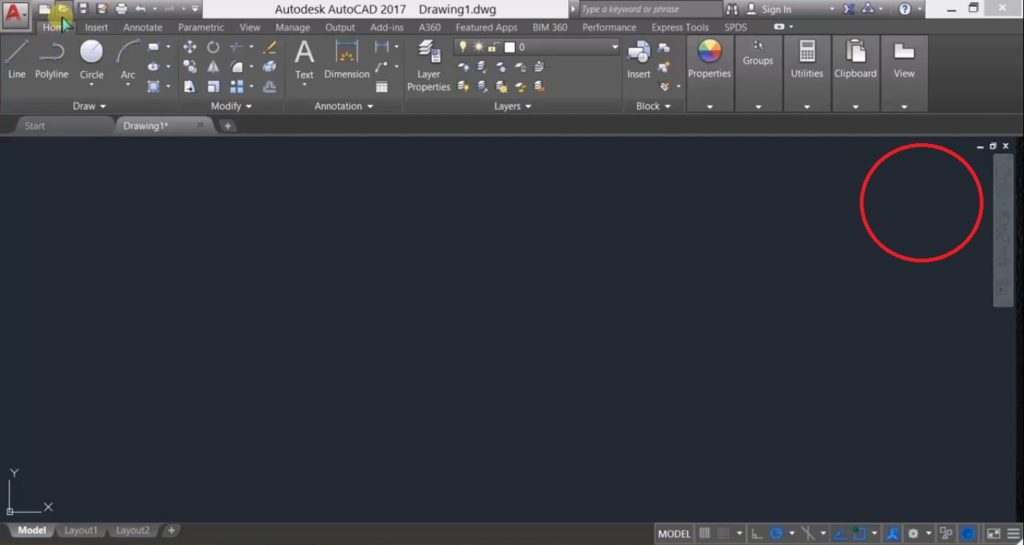
This can be the issue when you open AutoCAD. The viewcube should appear in the top right corner of the workspace. But in this AutoCAD viewcube is missing, just like below image. If this is your problem follow these steps.
Method 1
Before you start this restart your PC to free up memory. Now let’s start. This is the first method to fix the missing AutoCAD viewcube.
Step 1 : Open your AutoCAD in you PC.
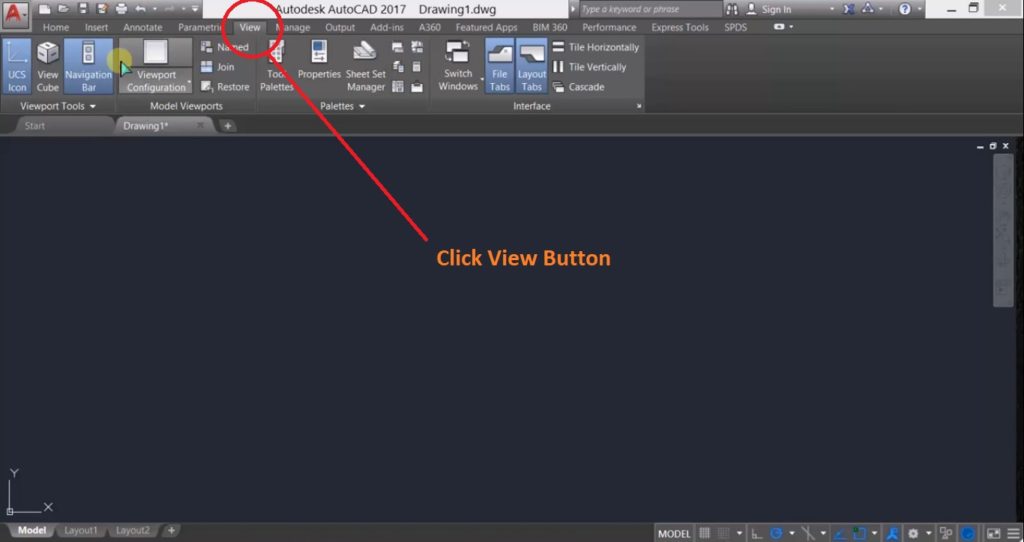
Step 2 : Click On View in the Title Bar as shown in the image.
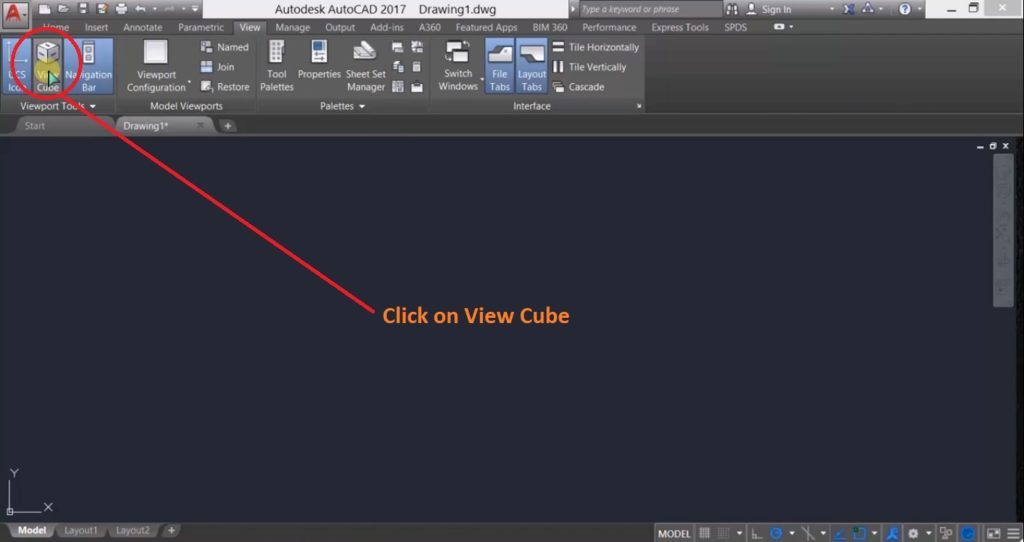
Step 3 : Click on View Cube as shown in the image.
You are Done..!! This will enable the view cube for you. If this doesn’t work for you try method 2.
Method 2
Sometimes view cube can also disappear due to low opacity. Here is how you can solve. Follow the steps and respective images to do this.
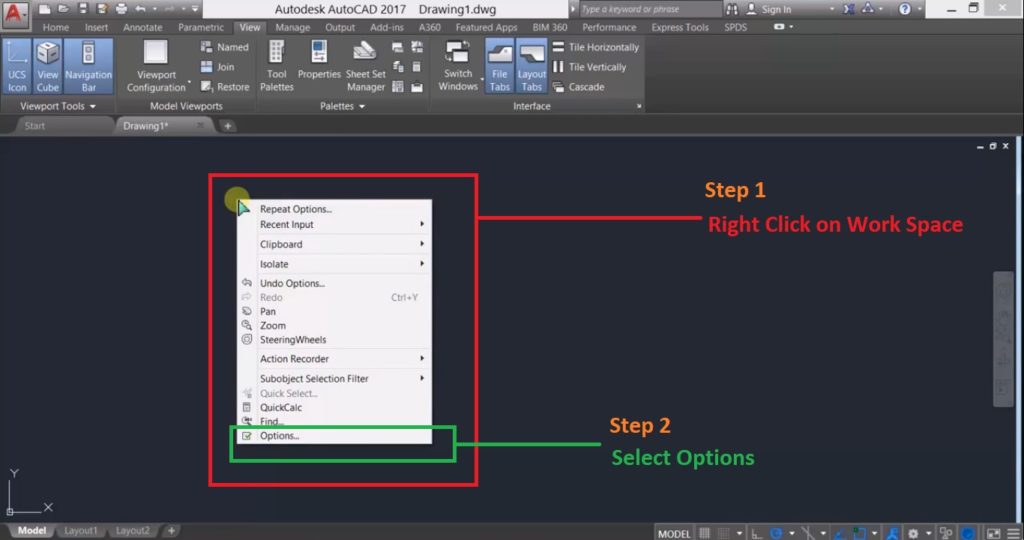
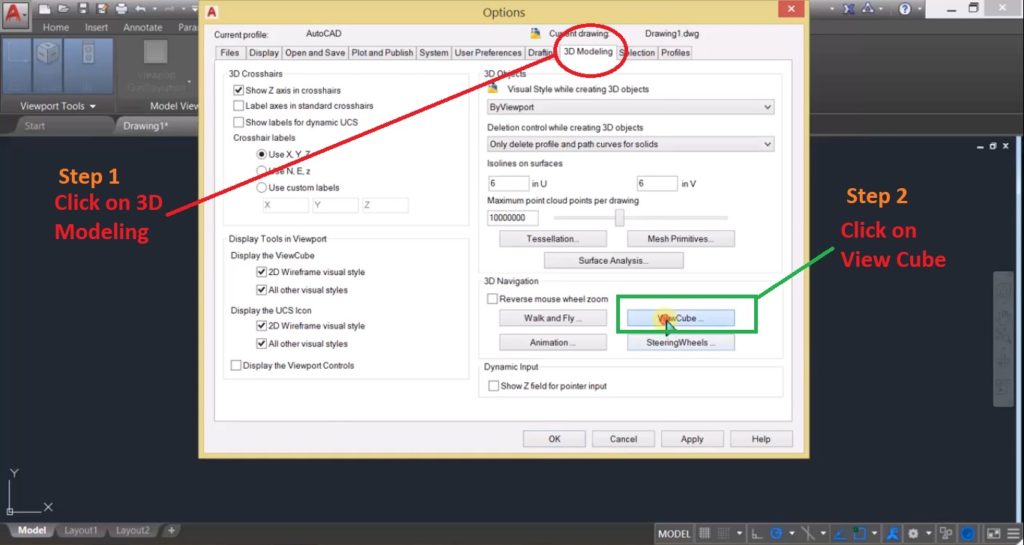
Step 1 : Right Click in your AutoCAD Work Space.
Step 2 : Select Options from the dialog box as shown in the image.
Step 3 : Select 3D Modeling from the option menu. And click View Cube as shown in the below image.
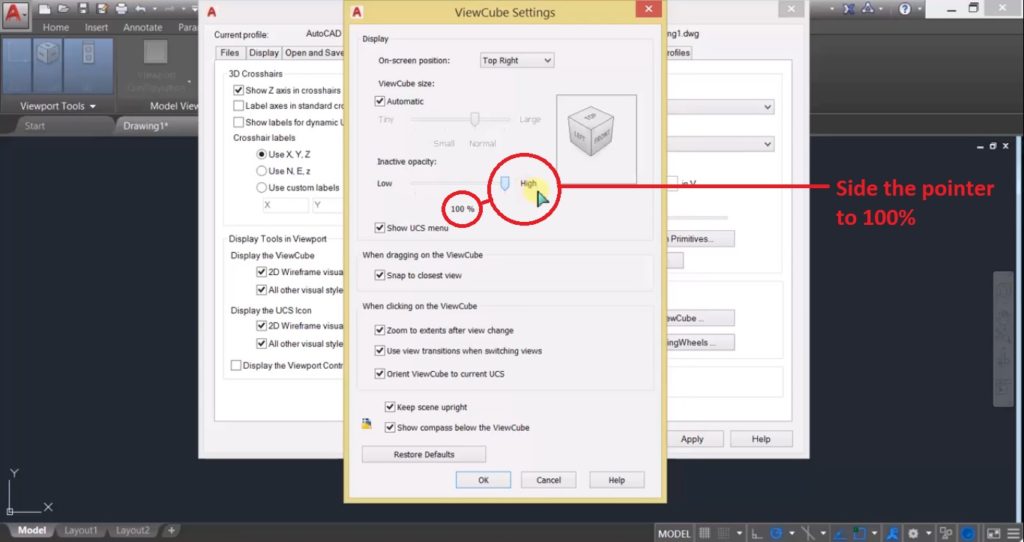
Step 4 : In the View Cube Settings, increase the opacity of view cube to 100% by sliding the pointer.
Step 5 : Press OK.
Done..!! Now you can see the viewcube in the top left corner of the work space.
Method 3
Another method to bring back the missing AutoCAD viewcube is using command. Try this method.
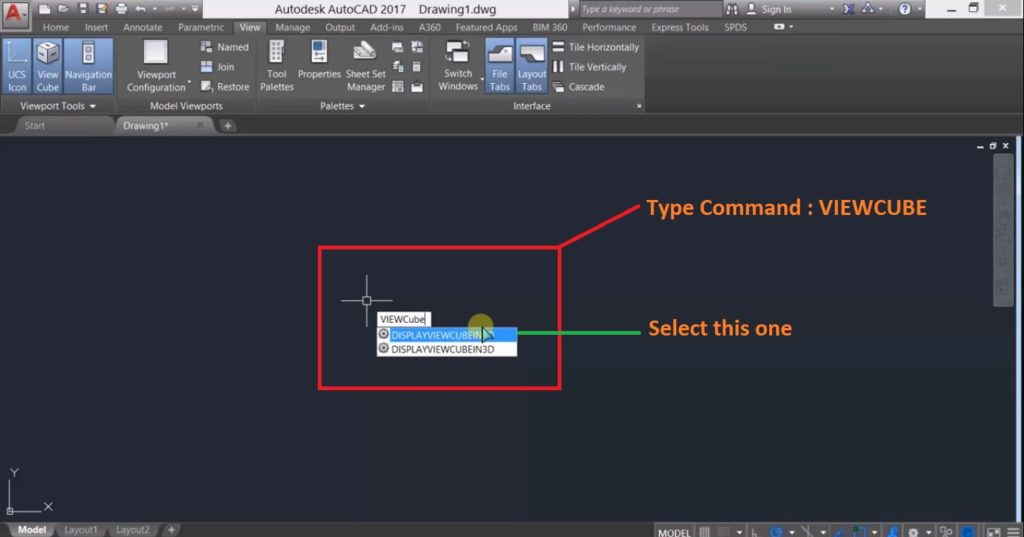
Step 1 : Type command VIEWCUBE in the work space using command prompt as shown in the image. And select Display viewcube in 2D.
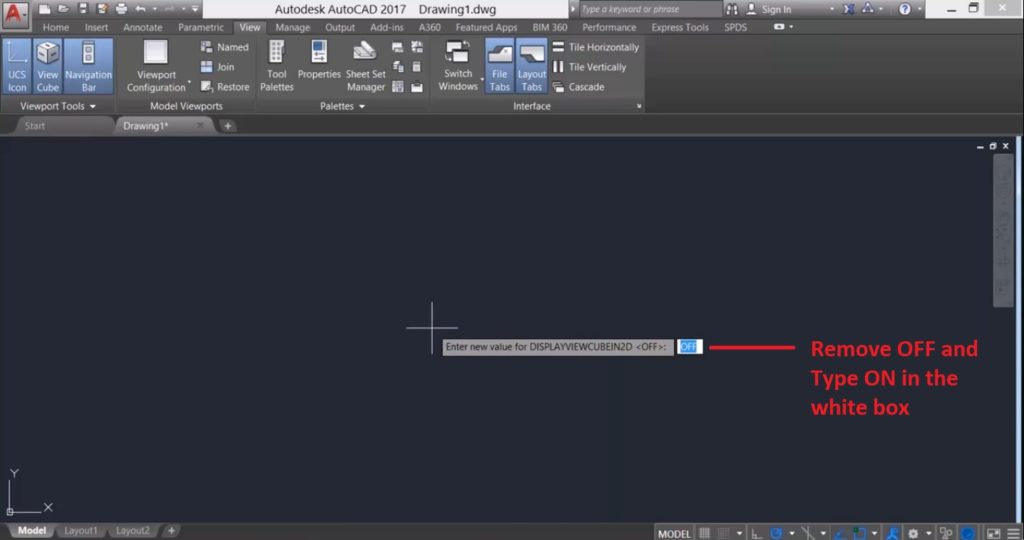
Step 2 : Type ON in the small white box which is appeared now. Remove OFF from it and press ENTER as shown in the below image.
Done..!! Now the viewcube will appear in the top right corner.
These are the common methods used to fix the missing AutoCAD Viewcube issues. I hope this helped you.
Thank You..
Comments are Welcomed 🙂
